




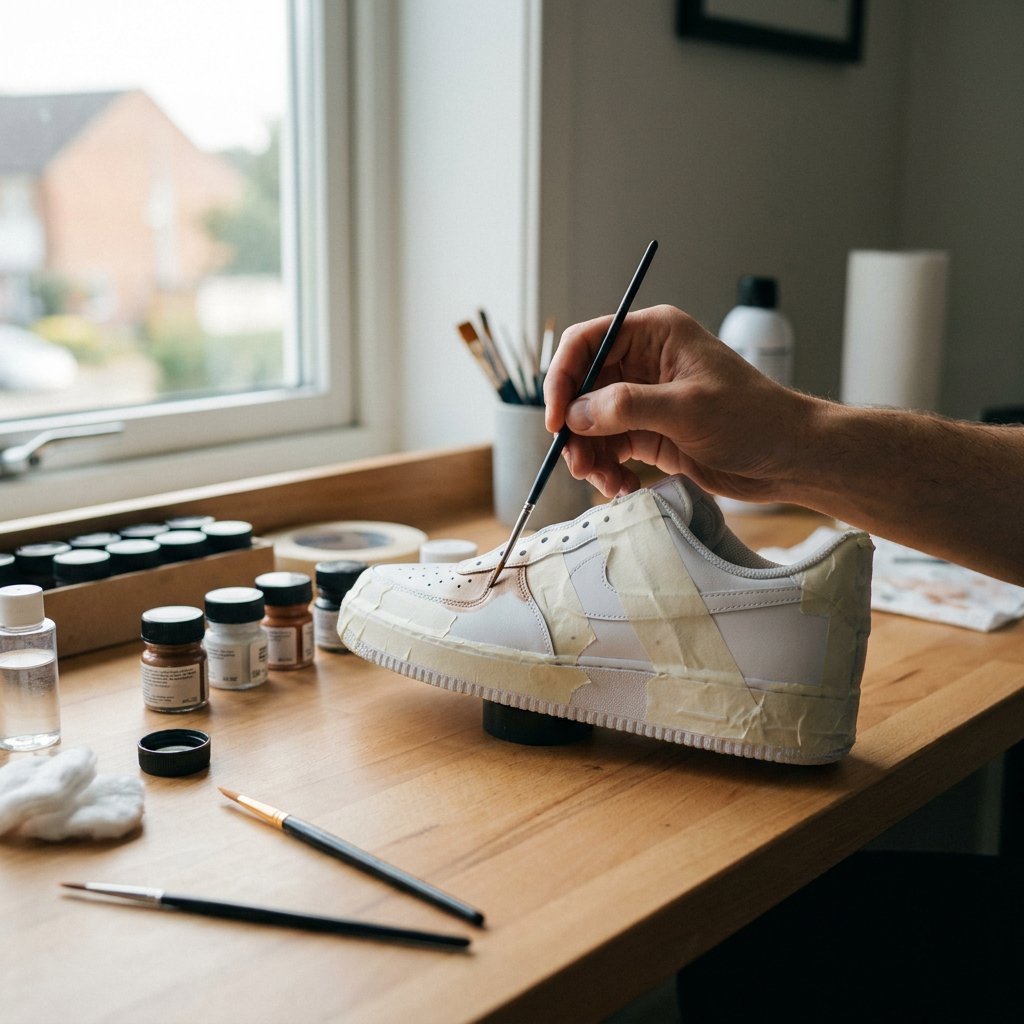
If you want to paint or customize sneakers yourself, your preparation largely determines the final result. The right paint, a clean surface, and thin coats make the difference between a clean finish and paint that cracks, stains, or peels quickly. In this sneaker paint guide, you’ll learn which paint to use, how to paint sneakers by material, and how to protect your design afterward. That way, you can work with much more control, whether you want to create a subtle recolor or a fully custom pair.
Explore Our Collection
Shop Now →What paint should you use to paint sneakers?
The best choice is special sneaker paint or leather paint that dries flexibly and adheres well to shoes. Regular hobby paint or standard acrylic paint can seem like a quick solution, but on sneakers it often causes problems. Think of cracks at flex points, poor adhesion, or a paint layer that is too thick and looks unnatural.
The best paint for coloring shoes depends on the material. For smooth leather, you’ll usually use sneaker paint or leather paint. For mesh, canvas, or textile, you often need an adjusted mix or a medium so the paint stays flexible and doesn’t dry hard. Suede and nubuck require a different approach again, because opaque paint can change the fiber structure.
- Smooth leather - sneaker paint or leather paint
- Canvas and textile - paint with a textile-friendly additive or textile paint
- Mesh - a flexible paint solution, often thinned or mixed with medium
- Suede and nubuck - only paint if you accept that the texture and look may change
What do you need to paint sneakers?
If you’re wondering how to paint sneakers, you need more than just paint and a brush. With the right tools, you’ll work cleaner, sharper, and more predictably. That pays off immediately, especially on small panels, seams, and color blocks.
- Sneaker paint in your chosen color, or base colors to mix
- Degreaser or preparer to remove the factory finish on leather
- Brushes in different sizes for larger areas and detail work
- Masking tape for clean lines
- Mixing cups or a palette
- Gloves and soft cloths such as microfiber cloths
- Optionally, a medium for mesh, canvas, or textile
- Finisher or protective top coat
It’s also best to work in a well-lit place and always test your color first on a sample piece or an inconspicuous area. Paint often looks darker or more intense when wet than when fully dry. If you prefer everything together, choose sneaker cleaning kits for cleaning and degreasing.
Preparation determines how neat and durable the result will be
Almost every good guide about painting shoes comes down to the same point: preparation is not optional. Paint only adheres properly if the surface is clean, grease-free, and properly prepared for a new layer. Skip this, and you’ll usually see it in peeling, streaks, or fast wear.
Clean your sneakers before you start
First remove dust, dirt, and residue from old care products. On a dirty surface, paint applies less evenly. Use a mild cleaner, a soft brush, and a cloth. Then let the shoe dry completely. Especially with white or light-colored sneakers, you want to avoid trapping dirt inside the paint layer. That’s why it’s smart to start with cleaning your sneakers before you start painting.
If you cleaned your sneakers thoroughly beforehand, it’s smart to protect them properly again after the project. For maintaining and protecting leather, suede, nubuck, mesh, and textile, HypedPair offers sneaker care products such as cleaner and protection spray.
Removing the top layer on leather
Leather sneakers often have a factory finish that limits paint adhesion. That’s why this layer is usually removed with a suitable preparer or deglazer. Work with a cloth or cotton pad and go gently over the areas you want to paint. You don’t need to sand aggressively if the product does its job, but the surface does need to be ready to absorb paint.
Use only light pressure and work in a well-ventilated area. Caution is especially important on painted panels or sensitive finishes. On faux leather and some synthetic materials, overly aggressive degreasing can actually cause damage.
Masking and preparing your work surface
Remove the laces from the shoe and carefully mask the edges, soles, and parts that should keep their original color. If needed, stuff the shoe with paper or use a shoe tree so the surface stays stable while painting. This is especially helpful on toe boxes and side panels.
Mixing sneaker paint without color mistakes
Many people search for a sneaker paint guide because they don’t just want to repaint something, but really want to create their own color. In that case, controlled mixing matters more than quickly combining a lot of paint. Always start with small quantities and note your ratios so you can recreate the same color later.
Base colors and color mixing
With red, yellow, blue, black, and white, you can already do a lot. You make orange with red and yellow, green with yellow and blue, and purple with red and blue. In practice, it works better to add small amounts gradually instead of mixing large volumes right away. Dark pigments overpower quickly in particular.
- White makes a color lighter and often a bit softer
- Black makes a color darker, but can also make it look duller
- An opposite color can help tone down a shade that is too bright
Why you should always test mixed paint first
The color in the bottle is not always the color on the sneaker. Paint dries differently, and the material also affects the final appearance. Smooth leather shows color differently than mesh or canvas. So always test first on paper, an old sample, or an inconspicuous spot. Let the test dry fully before deciding.
How can I paint sneakers? Step by step
If you want a practical answer to how painting sneakers works, it’s best to follow a fixed order. That helps you avoid rushing and keeps you in control of coverage, color, and detail.
1. Start with thin coats
Apply the paint in thin, even coats. A first coat rarely covers perfectly, and that’s normal. Thick coats only increase the risk of streaks, texture differences, and cracking. It’s better to build coverage gradually than to try to make it opaque in one go.
2. Let each coat dry properly
Wait between coats until the paint feels dry. You can sometimes speed things up with mild heat, but don’t overheat the material. Patience gives you a cleaner final result and a stronger paint buildup. On many projects, you’ll end up with 2 to 4 thin coats, depending on color, opacity, and the surface underneath.
3. Work from large areas to details
Start with the bigger panels, then move on to edges, logos, stitching, and small accents. That helps you keep an overview and prevents detail work from getting damaged while you’re still working on the rest. Masking tape helps with clean color sections, but only remove it once the paint has set enough.
4. Check for unevenness and touch up
Look at the sneaker after each coat in daylight or bright white light. Uneven coverage, wet edges, or small mistakes are easier to spot there than under warm artificial light. Only touch up where needed so the paint layer doesn’t become unnecessarily thick.
A different approach for each material
Not every sneaker reacts the same way to paint. You can see that in adhesion, absorption, drying time, and flexibility. That’s why understanding the material is essential if you’re looking for the best way to paint shoes.
Smooth leather
Smooth leather is usually the most predictable material to paint. After cleaning and degreasing, sneaker paint often adheres well here. Thin coats give the nicest result, especially on panels that flex a lot. A finisher then helps protect the paint layer even more. If you’re working with white leather shoes, also read more about cleaning leather sneakers for good preparation.
Canvas and textile
Canvas and textile absorb paint differently than leather. The surface is often more absorbent, so colors can turn out more matte or less even. A suitable textile mix or medium helps keep the paint workable and flexible. Expect to do extra testing in advance here, because the fabric structure remains visible.
Mesh
Mesh is trickier because it is flexible, open in structure, and sometimes synthetic. Paint that is too thick or simply the wrong type can make mesh go hard. So work extra thin, test the mix beforehand, and accept that a subtle color change is often nicer and more durable than a fully opaque repaint.
Suede and nubuck
You can’t approach suede and nubuck the same way as smooth leather. The fibrous structure reacts differently to liquid and paint pigment. Opaque paint often changes the appearance and feel of the material. If you want to preserve that typical texture, painting is not always the best option. So weigh the look and the risk carefully before you start.
Common mistakes when painting shoes
Most problems are caused not by the color itself, but by impatience or poor preparation. These are the mistakes beginners make most often:
- Not cleaning or degreasing properly before painting
- Applying coats that are too thick for quick coverage
- Using the wrong paint for the material
- Not testing the fully dry result
- Too little drying time between coats
- Wearing them immediately without finishing or protection
Fixing problems while painting
Even if you work neatly, something can still go wrong along the way. Fortunately, many mistakes can still be corrected if you act in time.
| Problem | Likely cause | Practical solution |
|---|---|---|
| Streaks in the paint | Coat too thick or applied unevenly | Work thinner and build up another thin coat |
| Color looks different after drying | Not tested on the dry result | Let it dry completely first and only then correct it |
| Paint cracks at a flex point | Paint layer too thick or unsuitable paint | Rebuild it in thin coats with flexible sneaker paint |
| Patchy coverage | Surface was not prepared evenly | Apply extra coats carefully after proper drying |
| Paint on the sole or edge | Not masked well enough or slipped with the brush | Remove it carefully as quickly as possible and tidy it up later |
Finishing and protecting your sneakers
Once you’re done painting, you want the result to stay looking good. First let the sneakers cure fully before wearing them. After that, you can use a suitable finisher for extra protection of the paint layer. Choose a finish that matches the look you want: more matte, neutral, or slightly glossier.
After customizing, regular maintenance still matters. Clean your sneakers carefully and use protection that suits the material. A sneaker protection spray can help reduce the impact of dirt and moisture, as long as you only use it once the paint and finish have fully cured. If you want a step-by-step explanation of how to protect the final result, read our guide on waterproofing and protecting sneakers.
FAQ about sneaker paint
What is the best paint for painting shoes?
For most leather sneakers, special sneaker paint or leather paint is the best choice. It is made to stay flexible and adhere better to shoes than regular hobby paint.
Can I use regular acrylic paint on sneakers?
That is usually not recommended. Regular acrylic paint is often less flexible and can crack or peel faster in areas where the shoe bends.
How many coats of sneaker paint do I need?
Usually, you’ll work with 2 to 4 thin coats. The exact number depends on the coverage, the color you use, and the material of the sneaker.
How long should paint dry on sneakers?
Let each coat dry before continuing, then give the complete pair plenty of time to cure. The exact drying time depends on the type of paint, coat thickness, and material.
Can you paint mesh sneakers too?
Yes, but mesh is trickier than smooth leather. Work thin, test beforehand, and only use an approach suitable for flexible material. A subtle recolor often works better here than fully opaque painting.
Should I protect sneakers after painting them?
Yes, that is recommended. First let the paint and finish cure fully. After that, you can maintain and protect the pair with products that suit the sneaker’s material. If you also want inspiration for finished designs, take a look at the custom collection.
This article was written by Marijn van der Heijden.



Leave a comment
This site is protected by hCaptcha and the hCaptcha Privacy Policy and Terms of Service apply.