


White soles keep your sneakers looking fresh and sharp—until dirt, scuffs and yellowing kick in. With the right approach, you can get your midsoles bright again and keep them clean longer. Below you’ll find a practical step-by-step plan, safe methods for stubborn stains, and smart tips to whiten yellowed soles and prevent them. Want more tips for the whole pair? At the bottom of this page you’ll find our complete guide.
Which method fits your soles and materials?
Not every sole is the same. Rubber midsoles and EVA foam can take a lot, but high-gloss or semi-translucent edges and yellowish TPU parts need extra care. Always start mild and test in an inconspicuous area. Avoid chlorine bleach and harsh solvents on prints, stitching and glue lines. A magic eraser works, but it’s mildly abrasive and can dull gloss. Prefer a mild sneaker cleaner or lukewarm water with a drop of dish soap. Do you have mesh or suede next to the sole? Mask the edges with painter’s tape so you only clean the white sidewalls.
Step-by-step: cleaning white soles
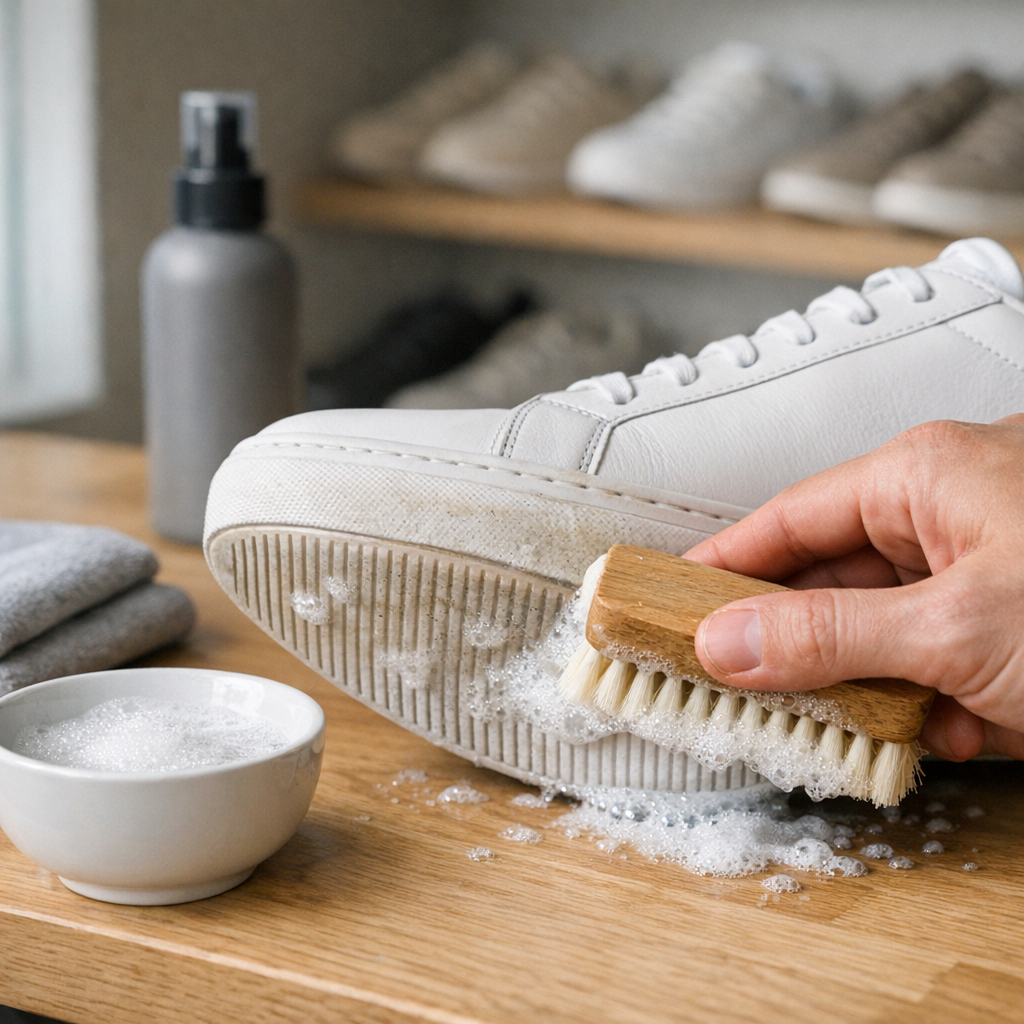
Step 1: Prep
- Brush off dry dirt and remove loose dust with a soft brush.
- Remove laces and mask the upper along the sole with painter’s tape.
- Lay out supplies: soft toothbrush or medium brush, microfiber cloth, bowl with lukewarm water.
No tools at home? Pick suitable helpers like brushes and cloths in our cleaning accessories for sneakers. If you use a mild cleaner or want a complete kit, check our sneaker care products for white and rubber soles.
Step 2: Basic cleaning
Make a solution of lukewarm water with a drop of dish soap, or use a sneaker cleaner. Lightly dip your brush, build up foam and work small circles over the white rubber soles. Wipe away foam in between with a damp cloth and repeat until the sole is clean. Cleaning white soles with baking soda works too: mix 2 parts baking soda with 1 part water into a paste, brush in briefly and wipe off. Whitening soles with toothpaste can be a quick option—use plain white toothpaste without gels or dyes and rinse thoroughly. Go easy on abrasive methods.
Step 3: Remove black marks
For rubber marks, a white eraser works surprisingly well. If that doesn’t do it, rub very lightly with a damp magic eraser and immediately wipe with a clean cloth. Treat stubborn scuffs spot-by-spot with an acetone-free nail polish remover on a cotton swab. Work fast, don’t press hard and neutralize right away with water and a cloth. Always test first near a seam or at the heel edge.
Step 4: Make yellowed soles white again
Yellowing is caused by oxidation and UV light. Mild cleaning won’t remove it. Use a whitening method: apply a thin layer of sole-whitening gel or a DIY paste of baking soda with a little 3 percent hydrogen peroxide to the yellowed areas. Cover with plastic wrap, place the sole in indirect sunlight for 30 to 60 minutes and rinse thoroughly. Repeat a few sessions until you’re happy. Don’t use this on transparent TPU parts and make sure the product doesn’t touch leather, suede or mesh. Always test first. If your soles remain stubbornly dirty or discolored, consider professional cleaning.
Quick clean on the go
Short on time? Cleaning wipes lift dust and surface dirt right away and keep white sidewalls tidy between deep cleans. Wipes won’t fully clean or de-yellow soles, but they do help prevent dirt from setting in.
Protect and keep them white longer
Prevention is easier than cure. After cleaning, protect the sole and upper with a sneaker protection spray. The water- and dirt-repellent HypedPair Sneaker Spray forms an invisible layer that makes it harder for grime to stick. Spray from about 20 cm away in 2 thin coats, let dry, and repeat every few weeks or after a thorough clean. Regular sneaker care also helps prevent yellowing and new stains. After each wear, quickly wipe the edge with a slightly damp cloth. That way, cleaning your sneaker sole stays a quick job.
Want to know more about full sneaker maintenance? Read the Sneaker cleaning: complete guide for uppers, insoles and aftercare.
As a finishing touch after clean soles, you can also replace your white laces for an as-new effect.
Frequently asked questions
How do you clean the white edges of sneakers?
Mask the upper with painter’s tape and brush away loose dirt. Clean with lukewarm water plus a drop of dish soap or a sneaker cleaner and a soft brush. Remove black marks with a white eraser or a lightly damp magic eraser. Avoid bleach and harsh solvents along seams and prints.
How do I make my yellow soles white again?
Treat yellowing with a whitening method. Apply a peroxide-based sole-whitening gel or a paste of baking soda plus 3 percent hydrogen peroxide in a thin layer, let it work for 30 to 60 minutes in indirect sunlight, rinse and repeat. Don’t use on transparent TPU parts and always test first.
How do you remove black scuffs from a white sole?
Start with an eraser. If that doesn’t work, rub gently with a damp magic eraser and wipe immediately. For stubborn scuffs, use a small amount of acetone-free nail polish remover on a cotton swab, then neutralize with water and a cloth. Work precisely and test beforehand.
This article was written by Marijn van der Heijden.


Leave a comment
This site is protected by hCaptcha and the hCaptcha Privacy Policy and Terms of Service apply.